Silicon or wires? Choosing an electrode for multi-channel single-unit recording
Silicon probes and wire bundles both record single units on many channels. How they differ in durability, impedance and channel count, and how to insert one.
April 5, 2022
6 min read
Updated October 13, 2026
Silicon probes and wire bundles both record single units on many channels at once. They differ in three ways that decide which suits an experiment: how they wear, what impedance to aim for, and how channel count scales with the size of the device. A wire bundle bends and can be built by hand; a silicon probe fixes the position of every site and adds channels without adding much width.
Research use only. NeuroNexus products are for non-clinical research use and must not be used in human or veterinary medical procedures.
The decision#
Moving from a single tungsten electrode to simultaneous recording on many channels changes what a lab can measure in a region: many units ↗ at once, their timing relative to each other, and their positions. Once a lab makes multi-channel recording a specific aim, one of the first decisions is the electrode: a wire bundle, such as the early hand-built tetrodes, or a silicon probe ↗.
The three differences that matter most:
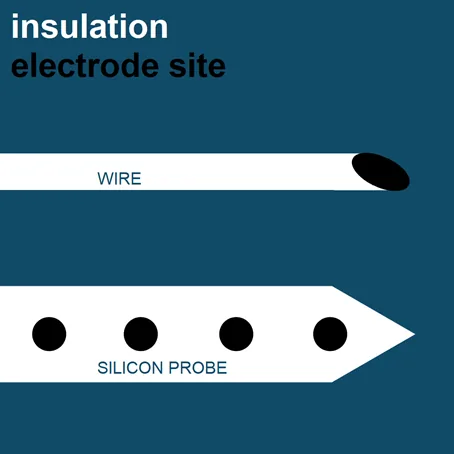
- Durability. A wire bundle is malleable, but its insulation can wear away over time. A silicon probe is rigid, and therefore brittle, but with proper cleaning it is reused across many acute sessions.
- Impedance. On a single sharp metal electrode, labs look for high impedance. On a silicon probe the site size is fixed, and the goal is low impedance.
- Channel count. A wire bundle gets wider with every channel added. A silicon probe adds sites along and across a planar shank, so its width grows far more slowly with channel count.
Durability#
Start with the material. A wire array can be bent out of shape and back again, and that tolerance is a safety margin: if the aim is to get several channels into a region at once, it works.
The advantage of a rigid device is that the layout of the sites never changes. The probe geometry ↗, meaning the shanks and the positions of the sites on them, is set when the probe is fabricated. Analysis that depends on the distance between channels, such as current-source density or locating a unit by its amplitude across neighboring sites, can be written once and trusted for every probe of that design.
Rigid also means brittle. A silicon shank breaks if it is loaded sideways or touched, so handling is the main risk to its life. Cleaned after every session and checked for impedance against its first-use value, an acute silicon probe is reused across many sessions; the care document sets out the procedure.
Impedance and recording quality#
Before an electrode enters tissue, check its impedance ↗, and know which direction is good for that electrode.
On a single sharp metal electrode, such as a tungsten microelectrode, labs look for high impedance. High impedance indicates a small exposed tip, and a small tip gives the selectivity needed to isolate one unit. As the insulation recedes over time, the exposed area grows and the electrode picks up more multi-unit activity, the background "hash".
That rule does not apply to every wire electrode. Tetrodes and other fine-wire bundles are commonly plated to lower their impedance, because a tetrode isolates units by comparing amplitudes across its four wires, not by the size of one tip.
On a silicon probe, low impedance is the goal. The site area ↗ is defined in fabrication, so a site does not grow as wire insulation does; selectivity is built into the design. Lowering the impedance of a site of fixed area lowers its thermal noise, so the background noise in the recording gets smaller and the signal-to-noise ratio ↗ improves. This is why probe makers work on site materials and coatings that lower impedance without enlarging the site.
Channel count and layout#
The number of channels in a wire bundle is limited by the diameter of device a researcher is willing to insert into the region of interest; each wire adds to it.
A silicon probe is a planar device made by thin-film microfabrication ↗, and the same process places more sites on smaller shanks. NeuroNexus catalog probes range from 4 to 1,024+ channels. A probe has one shank or several, each with its own sites, so the layout follows the experiment:
- Sites at one depth, grouped across shanks, to sample a single layer or nucleus at several points.
- Sites spread across depths in a laminar array, to record every layer of cortex or the length of a structure at once.
With enough channels, one probe does both in a single insertion. The shank count ↗ and the site pitch ↗ are the two numbers that set which.
Choosing between them#
A lab weighs scientific, mechanical and budget constraints when it plans an experiment, and both technologies have recorded good single-unit data. Wires suit a lab that builds its own electrodes, needs a malleable implant or records a few channels per target. Silicon suits a lab that needs a known, repeatable site layout, depth profiles, or more channels than a bundle of acceptable diameter can hold.
Inserting a silicon probe#
The brain's surface resists a probe. We recommend a durotomy before insertion where the preparation allows it; the acute surgical guide sets out when to leave the dura intact. Even with the dura removed, the pia resists, and the tissue under the probe dimples. Dimpling means the tissue is being pushed aside rather than penetrated, and it releases as the probe advances, so the final depth is not the depth that was set.
Insert slowly. If the tissue dimples, pause and wait a few minutes; the probe will work into the tissue and insertion can continue. Once at depth, let the tissue settle before recording.
For superficial targets, where dimpling can press on the tissue of interest or push the probe past the target, an insertion tool that vibrates the probe along its axis reduces the force needed to penetrate. The NeuralGlider, made by Actuated Medical, works this way and is available through NeuroNexus.